ESP-WROOM-02で玄関お出かけ天気カラー照明灯
(この記事内のESP8266用Arduinoスケッチで、livedoor Weather Hacksの8KB程度のJSONをハングアップなしに処理できる方法を募集中です。)
出かけるとき傘を忘れないよう、玄関に置く天気がわかるカラー照明灯を設置しましょう。

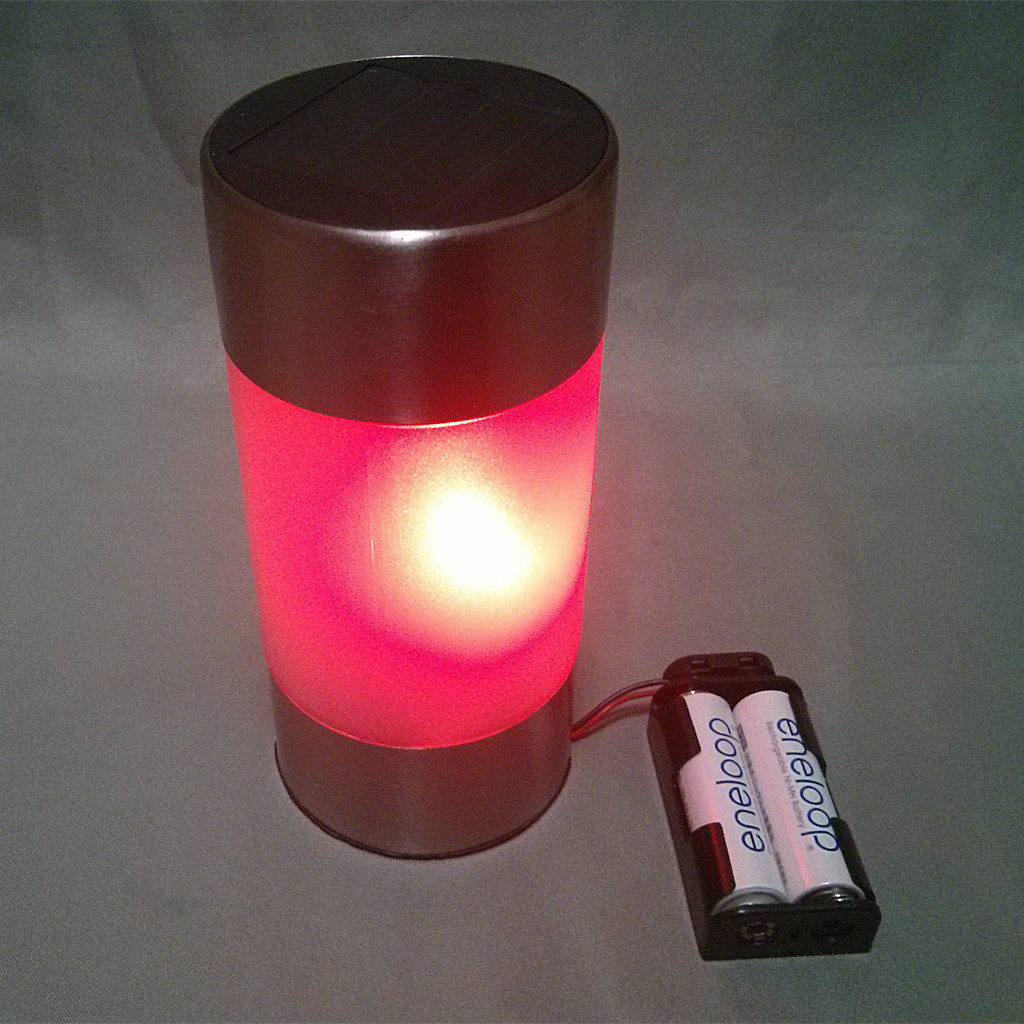
これは雨だね。
ESP-WROOM-02開発環境を作る
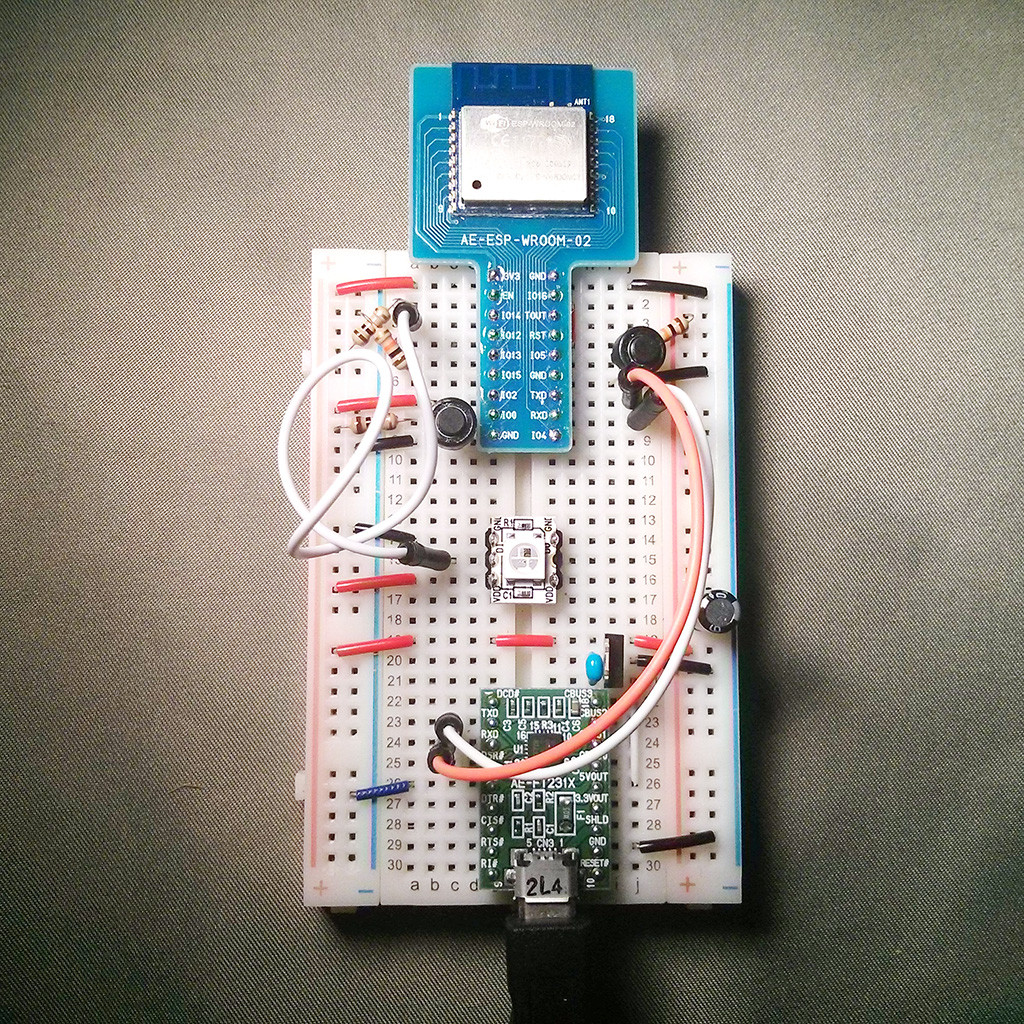
ESP-WROOM-02の開発環境を用意します。ちなみにこれはESP-WROOM-02ブレイクアウトボードのライターにもなるよ。
まずはブレッドボード
akizukidenshi-ogp-injector.dtpwiki.jp
秋月電子のESP-WROOM-02のブレイクアウトボード。信号引き出し部が300milになっているのでブレッドボードで使うといろいろ部品を載せやすいがESP自体はみ出てしまうのが難点。まさにブレッドボード用だと思う。
akizukidenshi-ogp-injector.dtpwiki.jp
ブレッドボードの真ん中にある部品は、マイコン搭載フルカラーLEDで、ESP-WROOM-02が電源Offになってもそのまま光り続ける便利なやつです。本来5V用だが、3.3Vでも何とか光る。生LEDにありがちな電流制限抵抗が不要で、信号線1本で色や消灯を制御できるので、マイコンを使った電子工作ではとても有用です。
akizukidenshi-ogp-injector.dtpwiki.jp
お天気データを仕入れよう
天気のデータは、昔懐かしいlivedoor Weather HacksからJSONで仕入れます。
昔自分が書いたlivedoor weather hacksのブログ
しかし、いろいろ試したが8KBのJSONをESP8266で処理するとうまくいかないので、これについては後でStackOverflowで質問するとして、レンタルサーバのPHPでカジュアルに処理することにしました。
<?php

//$url = 'http://weather.livedoor.com/forecast/webservice/json/v1?city=010010'; // 北海道
//$url = 'http://weather.livedoor.com/forecast/webservice/json/v1?city=020010'; // 青森県
//$url = 'http://weather.livedoor.com/forecast/webservice/json/v1?city=030010'; // 岩手県
//$url = 'http://weather.livedoor.com/forecast/webservice/json/v1?city=040010'; // 宮城県
//$url = 'http://weather.livedoor.com/forecast/webservice/json/v1?city=050010'; // 秋田県
//$url = 'http://weather.livedoor.com/forecast/webservice/json/v1?city=060010'; // 山形県
//$url = 'http://weather.livedoor.com/forecast/webservice/json/v1?city=070010'; // 福島県
//$url = 'http://weather.livedoor.com/forecast/webservice/json/v1?city=080010'; // 茨城県
//$url = 'http://weather.livedoor.com/forecast/webservice/json/v1?city=090010'; // 栃木県
//$url = 'http://weather.livedoor.com/forecast/webservice/json/v1?city=100010'; // 群馬県
//$url = 'http://weather.livedoor.com/forecast/webservice/json/v1?city=110010'; // 埼玉県
//$url = 'http://weather.livedoor.com/forecast/webservice/json/v1?city=120010'; // 千葉県
//$url = 'http://weather.livedoor.com/forecast/webservice/json/v1?city=130010'; // 東京都
//$url = 'http://weather.livedoor.com/forecast/webservice/json/v1?city=140010'; // 神奈川県
//$url = 'http://weather.livedoor.com/forecast/webservice/json/v1?city=150010'; // 新潟県
//$url = 'http://weather.livedoor.com/forecast/webservice/json/v1?city=160010'; // 富山県
//$url = 'http://weather.livedoor.com/forecast/webservice/json/v1?city=170010'; // 石川県
//$url = 'http://weather.livedoor.com/forecast/webservice/json/v1?city=180010'; // 福井県
//$url = 'http://weather.livedoor.com/forecast/webservice/json/v1?city=190010'; // 山梨県
//$url = 'http://weather.livedoor.com/forecast/webservice/json/v1?city=200010'; // 長野県
//$url = 'http://weather.livedoor.com/forecast/webservice/json/v1?city=210010'; // 岐阜県
//$url = 'http://weather.livedoor.com/forecast/webservice/json/v1?city=220010'; // 静岡県
//$url = 'http://weather.livedoor.com/forecast/webservice/json/v1?city=230010'; // 愛知県
//$url = 'http://weather.livedoor.com/forecast/webservice/json/v1?city=240010'; // 三重県
//$url = 'http://weather.livedoor.com/forecast/webservice/json/v1?city=250010'; // 滋賀県
//$url = 'http://weather.livedoor.com/forecast/webservice/json/v1?city=260010'; // 京都府
//$url = 'http://weather.livedoor.com/forecast/webservice/json/v1?city=270010'; // 大阪府
//$url = 'http://weather.livedoor.com/forecast/webservice/json/v1?city=280010'; // 兵庫県
//$url = 'http://weather.livedoor.com/forecast/webservice/json/v1?city=290010'; // 奈良県
$url = 'http://weather.livedoor.com/forecast/webservice/json/v1?city=300010'; // 和歌山県
//$url = 'http://weather.livedoor.com/forecast/webservice/json/v1?city=310010'; // 鳥取県
//$url = 'http://weather.livedoor.com/forecast/webservice/json/v1?city=320010'; // 島根県
//$url = 'http://weather.livedoor.com/forecast/webservice/json/v1?city=330010'; // 岡山県
//$url = 'http://weather.livedoor.com/forecast/webservice/json/v1?city=340010'; // 広島県
//$url = 'http://weather.livedoor.com/forecast/webservice/json/v1?city=350010'; // 山口県
//$url = 'http://weather.livedoor.com/forecast/webservice/json/v1?city=360010'; // 徳島県
//$url = 'http://weather.livedoor.com/forecast/webservice/json/v1?city=370010'; // 香川県
//$url = 'http://weather.livedoor.com/forecast/webservice/json/v1?city=380010'; // 愛媛県
//$url = 'http://weather.livedoor.com/forecast/webservice/json/v1?city=390010'; // 高知県
//$url = 'http://weather.livedoor.com/forecast/webservice/json/v1?city=400010'; // 福岡県
//$url = 'http://weather.livedoor.com/forecast/webservice/json/v1?city=410010'; // 佐賀県
//$url = 'http://weather.livedoor.com/forecast/webservice/json/v1?city=420010'; // 長崎県
//$url = 'http://weather.livedoor.com/forecast/webservice/json/v1?city=430010'; // 熊本県
//$url = 'http://weather.livedoor.com/forecast/webservice/json/v1?city=440010'; // 大分県
//$url = 'http://weather.livedoor.com/forecast/webservice/json/v1?city=450010'; // 宮崎県
//$url = 'http://weather.livedoor.com/forecast/webservice/json/v1?city=460010'; // 鹿児島県
//$url = 'http://weather.livedoor.com/forecast/webservice/json/v1?city=470010'; // 沖縄県

$opts = array(
  'http' => array(
    'method' => "GET",
    'header' => "User-Agent: tenki.php/0.1(+http://cl.hatenablog.com/entry/esp-wroom-02-weather-light)\r\n",
  )
);
$context = stream_context_create($opts);

$json = file_get_contents($url, false, $context);
$w    = json_decode($json);
$tenki = $w->{'forecasts'}[0]->{'telop'};

if (preg_match("/晴/", $tenki)) {
  $color = array(
    'red'   => 0,
    'green' => 0,
    'blue'  => 255,
  );
}
if (preg_match("/曇/", $tenki)) {
  $color = array(
    'red'   => 255,
    'green' => 180,
    'blue'  => 0,
  );
}
if (preg_match("/雪/", $tenki)) {
  $color = array(
    'red'   => 255,
    'green' => 255,
    'blue'  => 255,
  );
}
if (preg_match("/雨/", $tenki)){
  $color = array(
    'red'   => 255,
    'green' => 0,
    'blue'  => 0,
  );
}
header('Content-Type: application/json');
print json_encode( array('color' => $color));

exit;
最近やっとPHPを安定ビルドできるようになったのでPHPを使ってみた。上記PHPで、当日の天気の文字列が
- 晴っぽいなら
{"color":{"red":0,"green":0,"blue":255}} - 曇っぽいなら
{"color":{"red":255,"green":255,"blue":0}} - 雪っぽいなら
{"color":{"red":255,"green":255,"blue":255}} - 雨っぽいなら
{"color":{"red":255,"green":0,"blue":0}}
のJSON文書が出ます。雨が優先度高く、晴れが優先度低い。晴れのち雨とかだと雨、つまり赤となる。livedoor Weather Hacksはたまに暴風雪とかよくわかんない予報出ますが、まあしょうがないよね。
ESP-WROOM-02をArduino IDEでプログラミング
お天気APIのJSONを簡略化するJSON APIを作ったので、先ほど作っておいたテスト環境でプログラムします。プログラミング環境は今回はArduino IDE 1.6.5にESP8266用設定を追加したものを使います。
追加で、Arduino用ライブラリ
を入手します。また、このプログラムは10分間ごとに起動して、待ち時間は超低消費電力モード(deep-sleepモード)に入るので、IO16とRSTはジャンプワイヤでつないでおきます。詳しくは文末の参考文献で。

#include <ESP8266WiFi.h>
#include <Adafruit_NeoPixel.h>
#include <ArduinoJson.h>

#define RGBREDPIN 14

// 5mm版NEOPixel LEDの場合
//Adafruit_NeoPixel pixels = Adafruit_NeoPixel(1, RGBREDPIN, NEO_RGB + NEO_KHZ800);
// チップ版NEOPixel LEDの場合
Adafruit_NeoPixel pixels = Adafruit_NeoPixel(1, RGBREDPIN, NEO_GRB + NEO_KHZ800);

const char ssid[]     = "yourssid";
const char password[] = "yourpassword";

char url[] = "http://labo.dtpwiki.jp/tenki.php";

const int BUFFER_SIZE = JSON_OBJECT_SIZE(4) + JSON_ARRAY_SIZE(1);
StaticJsonBuffer<BUFFER_SIZE> jsonBuffer;

void setup() {
  // シリアル通信準備
  Serial.begin(115200);
  // NeoPixelLED準備

  pixels.begin();
  delay(10);

  // Wi-Fiに接続
  Serial.println();
  Serial.print  ("Connecting to ");
  Serial.println(ssid);

  WiFi.begin(ssid, password);

  while (WiFi.status() != WL_CONNECTED) {
    delay(250);
    showNeoPixel(0, 3, 0);
    delay(250);
    showNeoPixel(0, 0, 0);
    Serial.print(".");
  }

  Serial.println();
  Serial.println("WiFi connected");

  Serial.print  ("IP address: ");
  Serial.println(WiFi.localIP());
  delay(100);

  // メインルーチン(loopに置かなくてもよい)
  String resBody = wget(url);
  char json[resBody.length() + 1];
  resBody.toCharArray(json, sizeof(json));
  Serial.println(json);
  JsonObject& root = jsonBuffer.parseObject(json);
  if (!root.success()) {
    Serial.println("parseObject() failed");
  }
  JsonObject& color = root["color"];
  const char* red   = color["red"];
  const char* green = color["green"];
  const char* blue  = color["blue"];

  showNeoPixel( atoi(red), atoi(green), atoi(blue));

  Serial.println("closing connection");

  //1:μ秒での復帰までのタイマー時間設定  2:復帰するきっかけの設定(モード設定)
  ESP.deepSleep(600 * 1000 * 1000 , WAKE_RF_DEFAULT);

  //deepsleepモード移行までのダミー命令
  delay(1000);
}

void loop() {
  // (2016-01-14プログラム変更)
  // deepsleepモードで運用するので、loop関数は空でよい
  // 詳しくは参考文献で
}

String wget(char *url) {
  // URLからhostとRequestPathとportを作る
  String str_host;
  String requestPath;
  uint16_t port;
  makePath(url, &str_host, &requestPath, &port);
  int str_host_len = str_host.length() + 1;
  char host[str_host_len];
  str_host.toCharArray(host, str_host_len);

  Serial.print  ("connecting to ");
  Serial.print(host);
  Serial.print  (":");
  Serial.println(port);

  // Use WiFiClient class to create TCP connections
  WiFiClient client;

  if (!client.connect(host, port)) {
    Serial.println("connection failed");
    return String("");
  }

  Serial.print  ("requestPath: ");
  Serial.println(requestPath);

  // サーバにリクエストを送信
  String requestHeader = makeRequestHeader(host, requestPath);
  //Serial.print(requestHeader);
  client.print(requestHeader);
  delay(300);

  // レスポンスを処理
  String resHeader = "";
  String resBody   = "";
  httpGet(&client, &resHeader, &resBody);
  /*
  Serial.println("response header:");
  Serial.println(resHeader);
  Serial.println();
  Serial.print  ("response body:");
  Serial.println(resBody);
  Serial.print  ("Length: ");
  Serial.println(resBody.length());
  Serial.println();
  */
  return resBody;
}

void httpGet(WiFiClient *client, String *resHeader, String *resBody) {
  while((*client).available()) {
    String line = (*client).readStringUntil('\r');
    if ( line.equals("\n")) {
      break;
    }
    else {
      (*resHeader).concat(line);
    }
  }
  while((*client).available()) {
    String line = (*client).readStringUntil('\r');
    (*resBody).concat(line);
  }
}

void makePath(String url, String *host, String *requestPath, uint16_t *port) {
  String urlStr = String(url);
  if ( !urlStr.startsWith("http://") ) {
    Serial.println('URL Parse Error');
  }
  String urlStr2 = urlStr.substring(7);
  uint8_t p = urlStr2.indexOf("/");
  *host = urlStr2.substring(0,p);
  *requestPath = urlStr2.substring(p);
  *port = 80;
}

String makeRequestHeader( String host, String requestPath ) {
  String res = String("GET ") + requestPath + " HTTP/1.1\r\n"
   + "Host: "+ host +"\r\n"
   + "User-Agent: ESP8266WiFi.h (+http://cl.hatenablog.com/entry/esp-wroom-02-weather-light)\r\n" +
   + "Connection: close\r\n"
   + "\r\n";
  return res;
}

void showNeoPixel(uint8_t r, uint8_t g, uint8_t b) {
  pixels.setPixelColor(0, r, g, b);
  pixels.show();
}
いろいろ試行錯誤して、試作ボード上で納得いく動作が出来ましたか?
CerevoのESP-WROOM-02のボードにプログラムを書き込む
先ほどのブレッドボードは、実はCerevoのESP-WROOM-02ブレイクアウトボード用の書き込み環境でもあったのです。サクッと書き込みます。
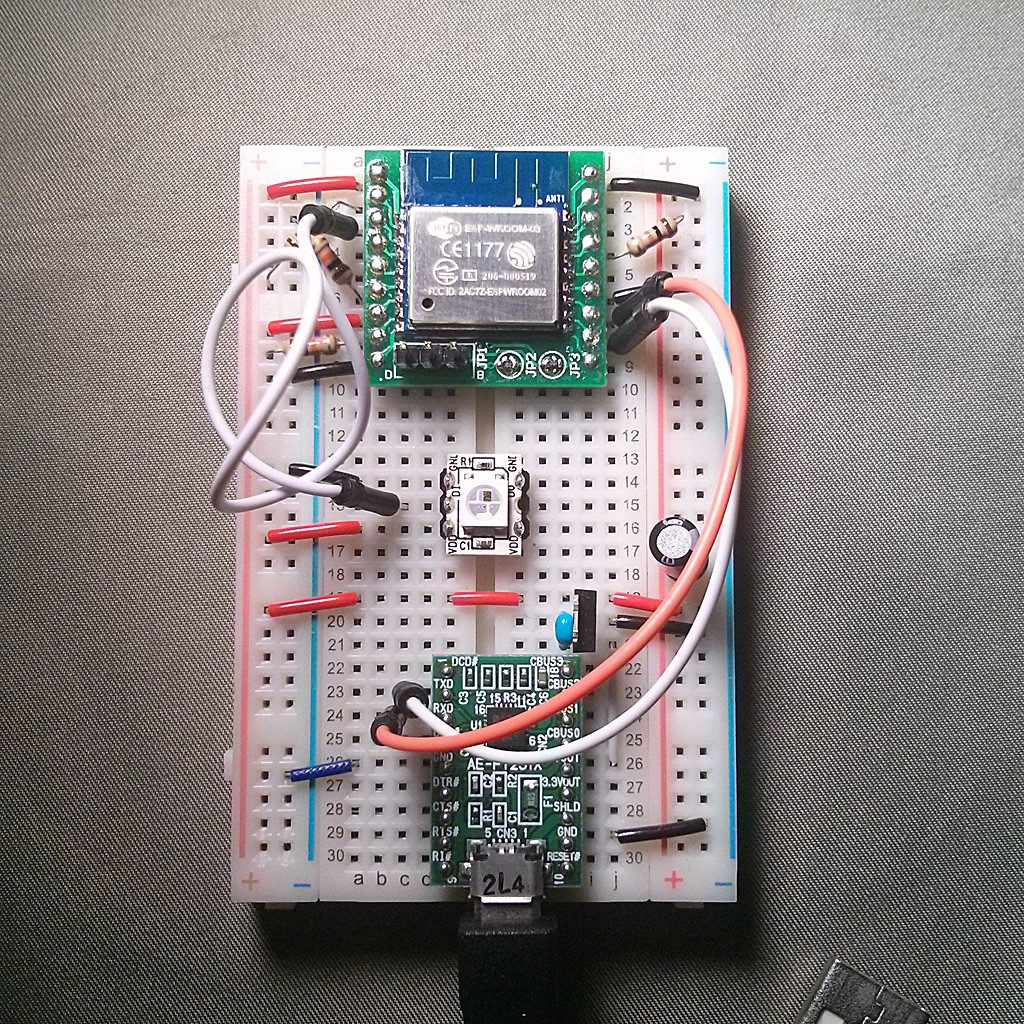
書き込んだ後、このまま動作テストもできます。
ミニブレッドボード上で動くよう組み立てる
部品表
| 品名 | 価格 | コメント |
|---|---|---|
| ミニブレッドボード BB−601(白) | 130 | 生け花におけるオアシスみたいなもん |
| 電池ボックス 単3×2本用(Bスナップ)BH−321−1B | 40 | 006Pスナップがかっこよくて電極なめてみたくなる |
| ジャンパーワイヤー付バッテリースナップ(縦型) | 40 | ブレッドボードにリードが挿せて便利 |
| マイコン内蔵RGB 5mmLED PL9823-F5 | 40 | 砲弾型はチップ型と色配列違うので注意 |
| Cerevo CDP-ESP8266 | 842 | 小型ESP-WROOM-02ブレイクアウトボード。要はんだ付け |
| TPS63000 昇降圧DC-DCモジュール(3.3V/5V) | 900 | 2.4Vや3.0Vや5Vを3.3Vにしてくれる。要はんだ付け |
akizukidenshi-ogp-injector.dtpwiki.jp
akizukidenshi-ogp-injector.dtpwiki.jp
akizukidenshi-ogp-injector.dtpwiki.jp
akizukidenshi-ogp-injector.dtpwiki.jp
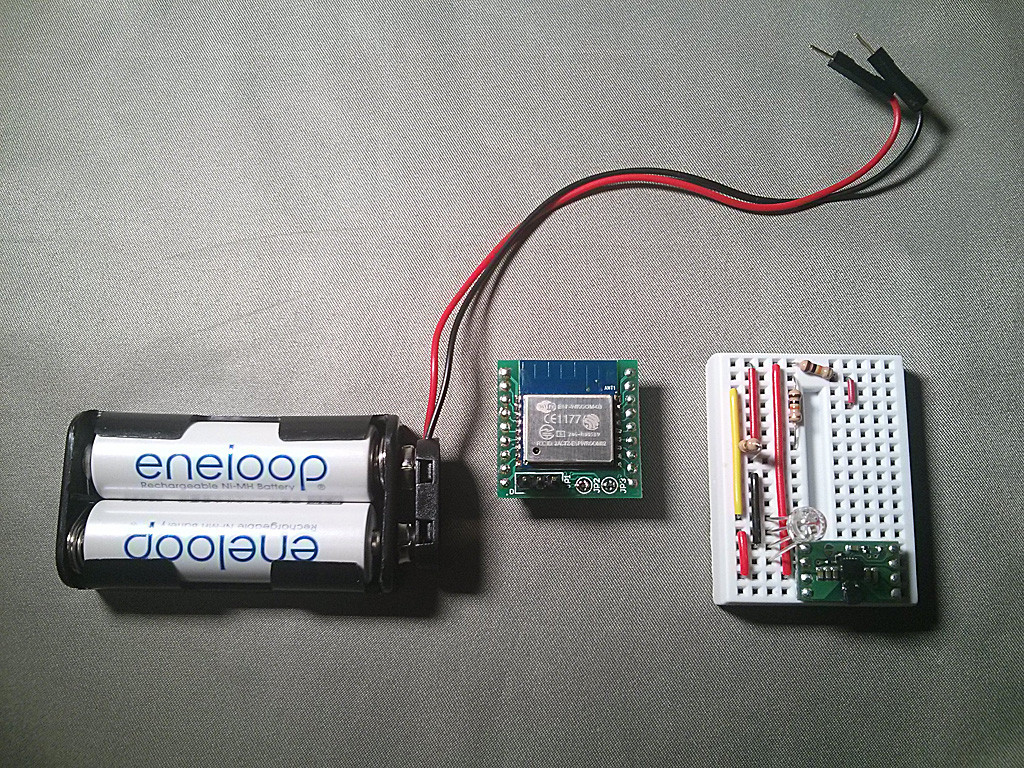
ミニブレッドボードに部品を全部乗せるのが大変。なお、ここで使用したTPS63000搭載DCDCコンバータモジュールは昇圧・降圧の両方対応なので、1.8V~5.5V、具体的に言うとエネループ2本(2.4V)・アルカリ乾電池2本(3V)・USB電源(5V)でも動かせるようになります。
動作確認
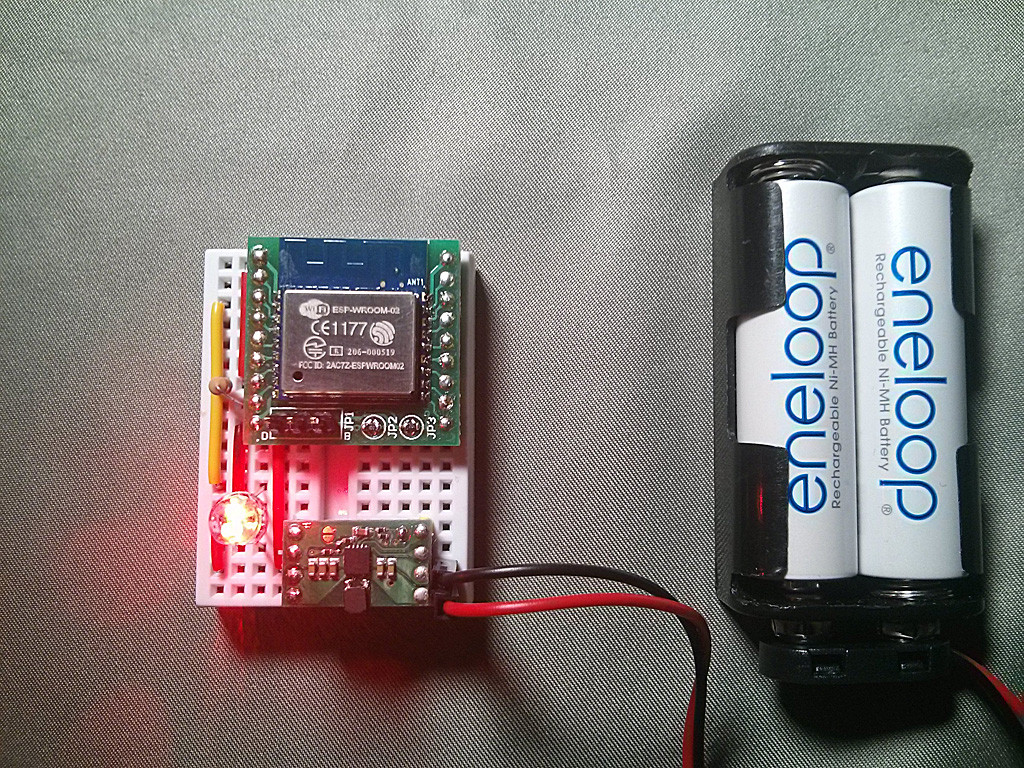
ミニブレッドボード上に組み立てた構成で、実際に動くかどうか確認します。
マイコン内蔵5mmLEDなのですが、マイコン自体はチップ型LEDと互換性があるのですが、色が赤と緑とで反転しています。マイコン内蔵型なのでピンを入れ替えて対応するとかできませんので、プログラム側でRGB三色の順番を入れ替えられるようになっています。そこを書き換えましょう(プログラムの前方でコメントアウトしているところ)。
イオンのソーラーステンレスライトに組み込む
一軒家の玄関わきにさしてある太陽電池で光るLEDライトを買ってきます。

2個入っているので多い日も安心です。
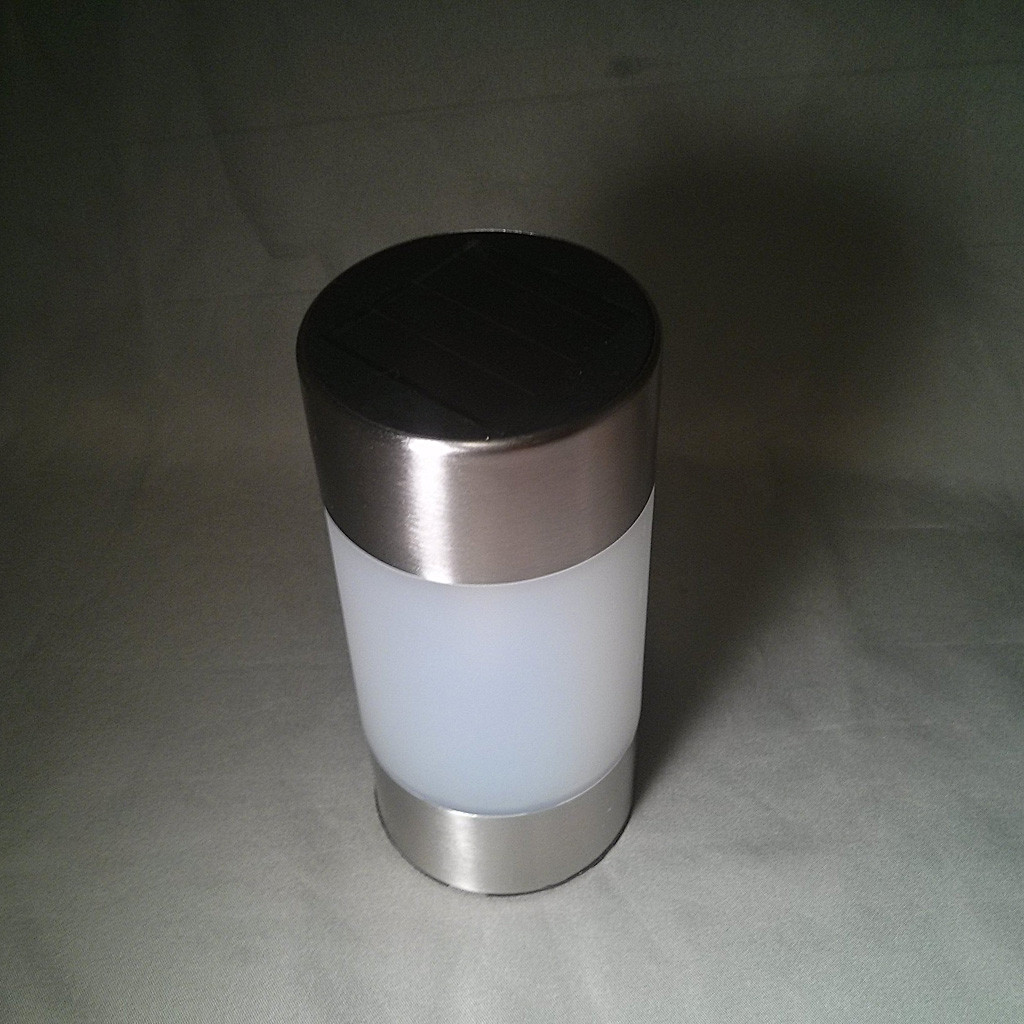
イオンが近くにない場合は4個入りですがAmazonで

タカショー ソーラー ステンレスミニマーカーライト4個セット
- 出版社/メーカー: タカショー
- メディア: Tools & Hardware
- この商品を含むブログを見る
分解した蓋側(写真右)には、太陽電池と単四型ニッケル水素乾電池と、LEDドライバIC CL0116 が入っていてこれはこれで面白いのですが、今回は使いません。
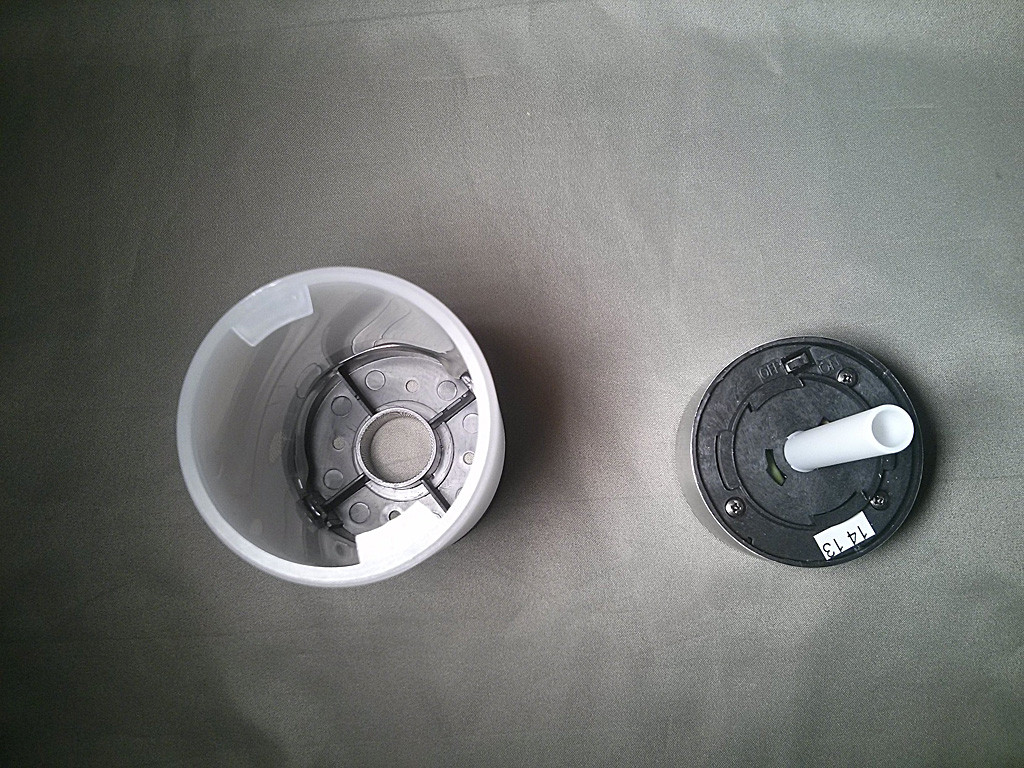
筒側のほうは、下の蓋と接着されていて外れませんが、ペグ(地面に挿す杭)が差し込まれるように穴が開いています。

ミニブレッドボードの制作物を中に入れ、下の穴から電源ケーブルを外に出します。
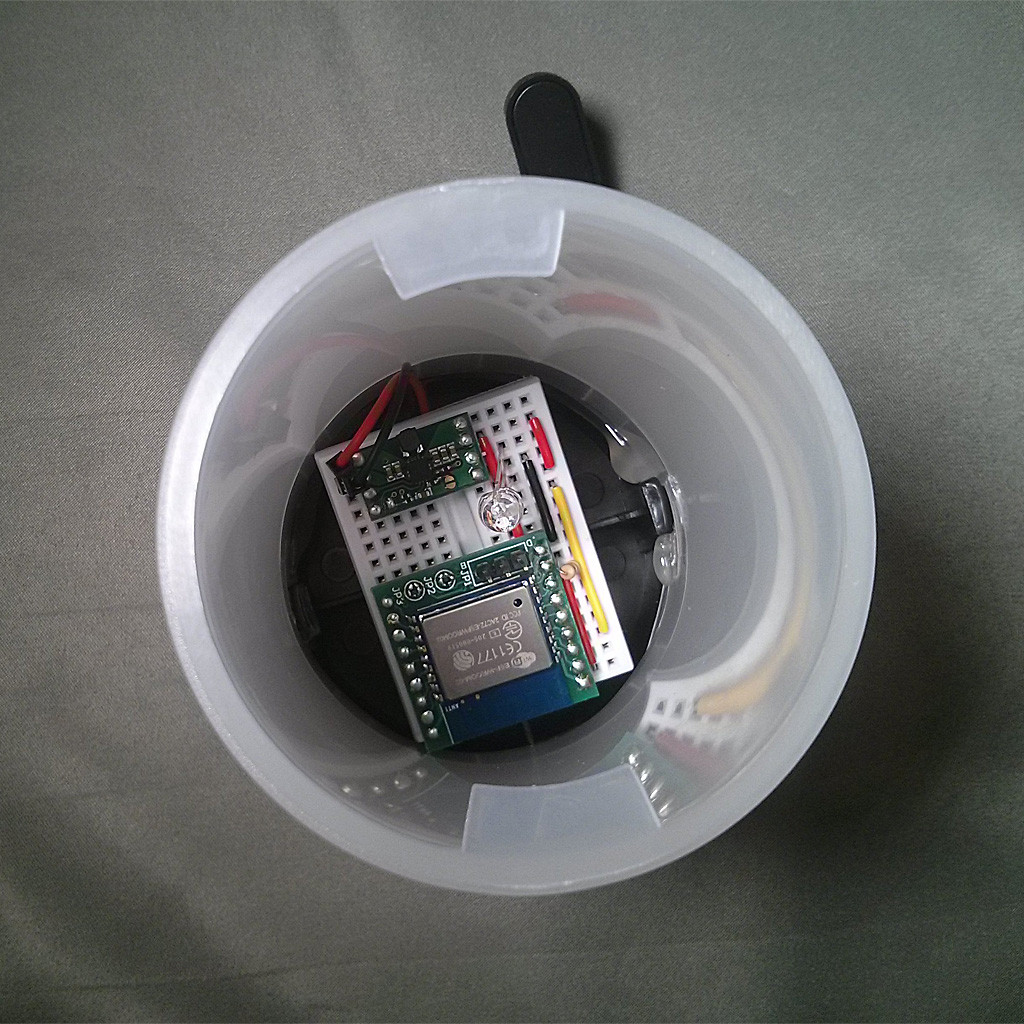
あとは、蓋をします。頑張れるのならば、LEDを蓋側から生えている導光管にはめ込めるとベストです。
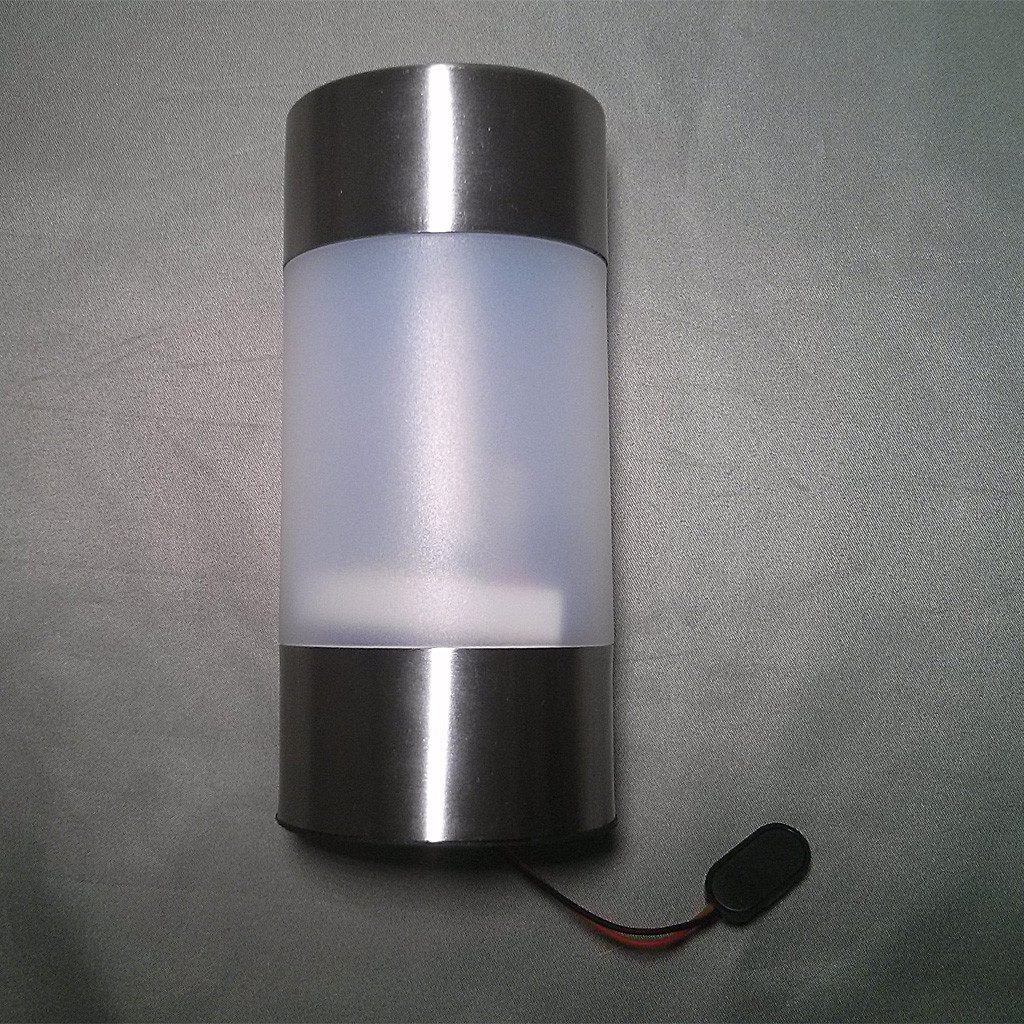
電池をつなぐと、Wi-Fi経由でJSONを取得して、天気によって決まった色で光ります。
晴れの日はこんな感じです。
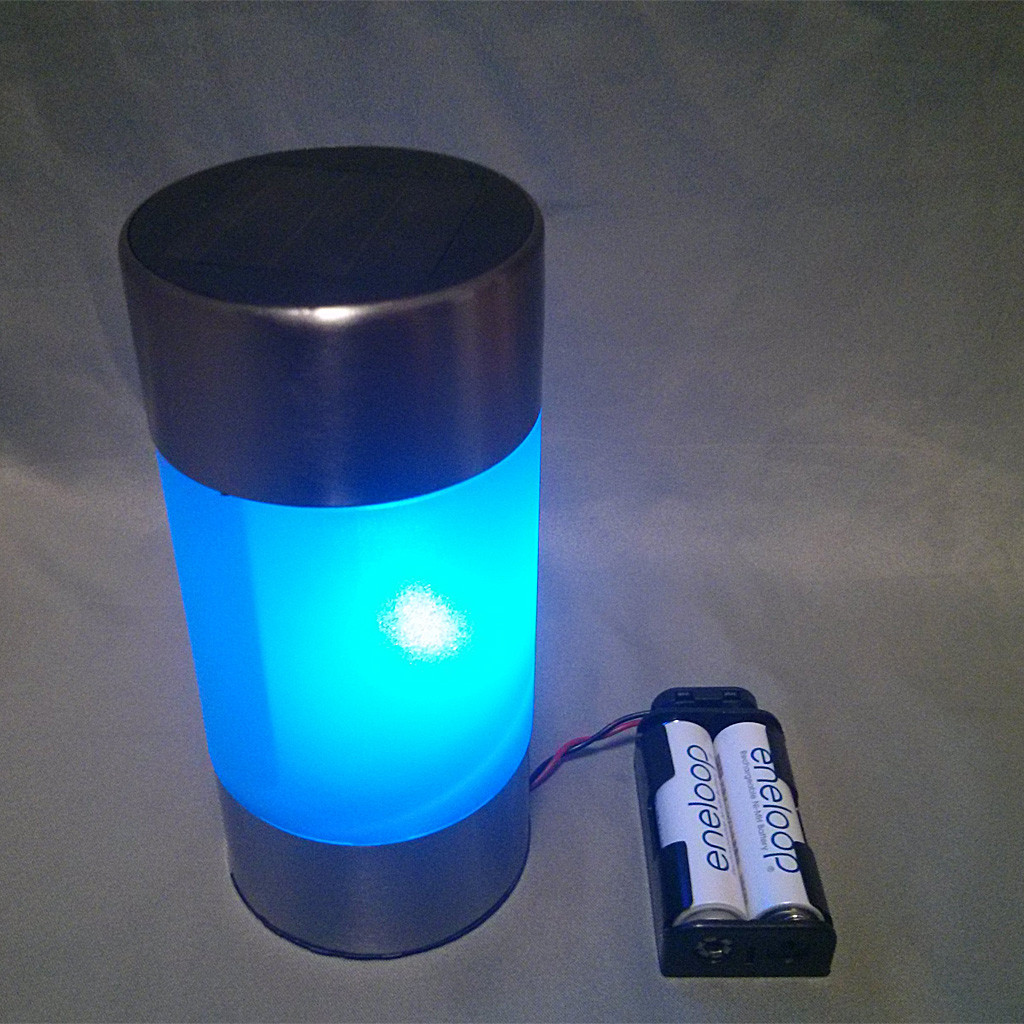
色がJenkins CIっぽくていやっていう場合は、PHP側で変更できるんですね。RGB値で好きな色にしましょう。
参考
(2016-01-29追記)
LIGで似たようなの作り始めてた
LIGといえば現職の会社のブログがLIGのオウンドメディアをパクっていてつらい